Deploying Microservices Application on Kubernetes via Helm
Introduction
If you’ve worked with full-stack web applications or cloud-native systems, chances are you’ve heard of Docker & Kubernetes. But have you ever paused to consider what these two technologies really are and how they complement each other? Docker and Kubernetes are like the dynamic duo of the tech world—think Bonnie and Clyde, but for containers and orchestration.
When working with Docker containers or microservices, Kubernetes often becomes part of the equation, along with tools like Argo CD and Helm to streamline deployments and manage workloads.
In this post, we’ll explore how to deploy a complete end-to-end application on a Kubernetes cluster. This application will include a frontend layer, a backend layer, a Redis database, and an ML service. We’ll cover how these components are deployed, how they communicate, and how to write application code that ensures seamless interaction between them.
Finally, we’ll dive into how you can design modern, scalable, and elastic applications using Docker, Kubernetes, and Helm—making the most of these powerful tools for today’s cloud-native world.
S-1) Choose YOUR Kubernetes cluster
The first step in deploying your Kubernetes cluster is to determine the type of cluster you’ll use. Your choice should be guided by several factors:
Management Preferences: Do you prefer a self-hosted, self-managed Kubernetes cluster, or are you leaning towards a fully managed cloud-based option like Amazon EKS?
Cloud Provider: Where are you planning to host your application? The cloud platform you choose plays a significant role in determining the Kubernetes solution you'll opt for.
Workload Requirements: Consider the scale of your application. Are you expecting millions of users or just a few thousand? Your cluster needs to align with your traffic and resource expectations.
There are numerous Kubernetes solutions available, each with different features and pricing. Choosing the right one depends on the nature of your application and your budget. It’s crucial to strike a balance between cost-effectiveness and alignment with your goals. Here is list of popular Kubernetes distributions link
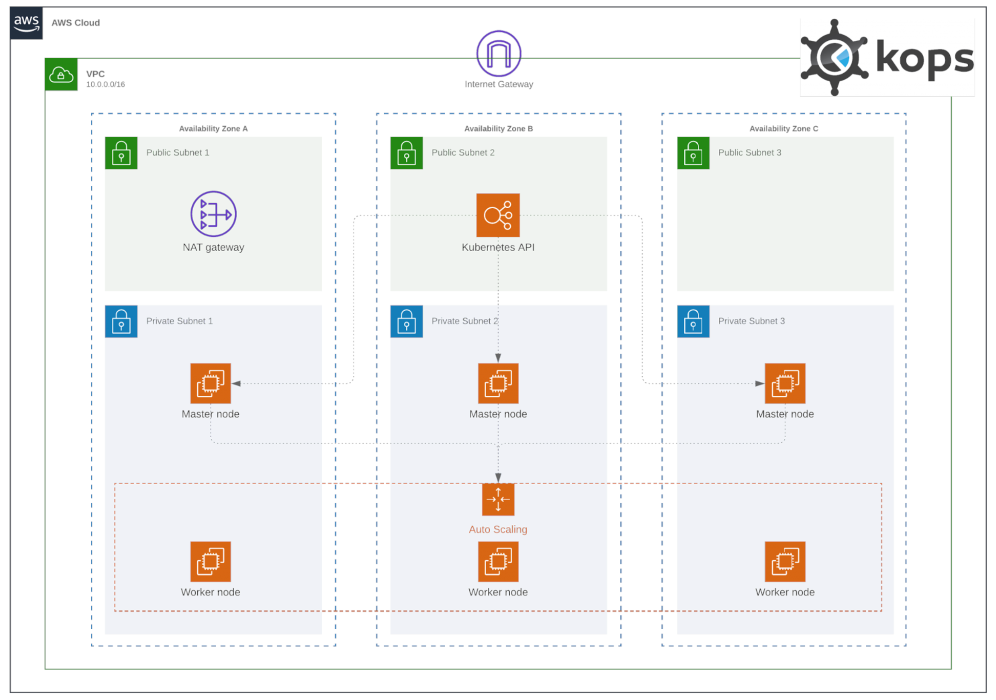
For this demonstration, we’ll go with a self-hosted, self-managed Kubernetes solution using KOps on AWS EC2 instances. If you’re unfamiliar, KOps (short for Kubernetes Operations) is a tool that simplifies the creation of a complete end-to-end Kubernetes cluster. It works seamlessly with AWS and other cloud providers, making it an excellent option for those looking to gain hands-on experience with cloud-based Kubernetes setups. kops
With this setup complete, I’ll assume a DNS address is already assigned to the cluster and ready for use. Now, use the commands below to spin up a multi-node cluster directly.
To Spin up a cluster :
kops create cluster --name <DNS-Name> --state=<BUCKET-NAME> --zones=us-east-1a,us-east-1b --node-count=2 --node-size=t3.small --master-size=t3.medium --dns-zone=kube.proddeploy.xyz --node-volume-size=8 --master-volume-size=8

kops update cluster --name <DNS-Name> --state=<BUCKET-NAME> --yes --admin
To Validate a cluster [Wait 10-15 min] :
kops validate cluster --state=<BUCKET-NAME>
To Delete a cluster:
kops delete cluster --name <DNS-Name> --state=<BUCKET-NAME> --yes
S-2) Understanding the Architecture
Our application is built on a well-structured foundation with four key components, organized into three major layers:
Client Layer: The front-facing interface for users.
Business Logic Layer: The core processing engine that handles application logic.
Database Layer: Where data is stored and managed.
This structure adheres to the widely-used 3-tier architecture, a common approach in software development that ensures separation of concerns, scalability, and maintainability.
To make the application more modular and scalable, we’ve adopted a microservices architecture. Each piece of application logic is divided into independent services, making it easier to manage and scale within a Kubernetes environment.
Our application features four microservices:
Frontend Microservice: Handles the user interface and client-side interactions.
Backend Microservice: Acts as an intermediary between the frontend & other backend services & cache.
ML Microservice: Powers the machine learning capabilities of the application.
Redis Cache Microservice: Speeds up data access by caching frequently used information.
We leverage Kubernetes to orchestrate these services seamlessly. Some of the essential Kubernetes components we use include ClusterIP, Deployments, Secrets, Config-Maps, Stateful-Sets, Ingress etc.
S-3) Understanding the Application Workflow
The workflow of our application is designed to ensure smooth communication, efficient data processing, and resource optimization. Here’s how it works:
1. User Request and Domain Routing
When a user interacts with the application, they first access a domain. This domain is routed via a DNS service (e.g., GoDaddy) to the Ingress Controller in our Kubernetes cluster.
API Traffic: Routed directly to the backend service.
Other Traffic: Routed to the frontend service, which serves a Next.js application.
2. Frontend Functionality
The frontend, built with Next.js, collects user data and handles client-side interactions. This data is then sent to the backend service. Communication between the frontend and backend is managed through the Ingress Backend Controller deployed within the Kubernetes cluster.
3. Backend Processing
The backend service processes the requests received from the frontend. Here's what happens next:
Querying the ML Service:
The backend queries the ML microservice using its Cluster IP, enabling internal communication within the cluster. ML-Service computes the result and returns appropriate result.Caching Results:
The response from the ML service is stored in a Redis cluster. This allows the application to quickly serve duplicate requests without reprocessing, saving valuable resources.
4. Handling Failures Gracefully
The microservices are designed to be resilient. If any service, such as Redis or the ML service, goes down:
The backend continues to function, generating appropriate responses or errors.
Fallback mechanisms ensure the user experience remains consistent.
5. Efficient Resource Utilization
By caching results in Redis, we reduce repetitive computations, ensuring faster responses for duplicate requests and lowering overall resource usage.
I think that's enough technical jargon for now 😅. Let's dive into the hands-on part.

